

Using Sauriq for plans only
You don’t need the canvas to use Sauriq. If your team wants a plan of who does what and when, you can work entirely in a plan’s Table, Gantt, Kanban and Calendar tabs. This page shows how. The full reference is Plans and the Gantt.
Open your plan
Section titled “Open your plan”Select Plans in the sidebar and open a plan. A plan whose canvas has no nodes opens on the Table, and so does a plan without a canvas. After that, Sauriq reopens the tab you last used in this browser.
A new workspace already has one plan.
Create another plan
Section titled “Create another plan”Any member of the workspace can create a plan.
- Select Plans in the sidebar and open one of the workspace’s plans.
- Select New plan beside the plan name at the top of the page.
- Enter a Plan name and select New plan.
The new plan opens, empty and without a canvas. The plan name at the top of the page opens the list of the workspace’s plans, so you can switch between them.
Hide the Canvas tab
Section titled “Hide the Canvas tab”Canvas is always the last tab. If your team never uses it, an editor can click the plan name and turn on Hide Canvas tab. The tab is hidden for everyone on that plan. Links to the canvas or to one of its nodes still open it, so nothing is lost.
Build the plan in the Table
Section titled “Build the plan in the Table”The Table shows items as rows, grouped by their Group. Any member of a research workspace can add items. In the Institution Workspace, you need to own the plan or be an institution owner or admin. See The Institution Workspace.
To add an item:
- On the Table tab, select + Add item under a group. In an empty plan, select Add item.
- A row named New item appears, set to Planned from today for a week. Select its name and type the item’s name.
- Fill in the other cells in its row, such as Person, Status, Start and End.
Each change saves on its own, with no save button, and the item shows in the Gantt, Kanban and Calendar tabs too. New item in the toolbar adds an item the same way, to the first group.
- Type in a cell to edit it.
- To start a new group, click Add group below the last group and type a name. A group can’t be empty, so this also adds its first item. To move an item to another group, drag its row there, or change Group in the item’s detail panel. Items without a group are listed under General.
- Columns shows, hides and reorders the columns. Filters narrows the rows by status, priority, assignee, work package, group or a search.
- Select several rows to change their status, priority, assignee or dates together, or to archive or delete them.
Each item has a Status (Planned, In progress, Blocked or Done), a Priority from P1 (highest) to P5, an Assignee and Additional people, Start and End dates, Progress, Planned hours, Labels and a Description. Open an item to add Files and Comments and to see its Activity.
Schedule in the Gantt
Section titled “Schedule in the Gantt”The Gantt shows the same items as bars on a Day, Week or Month scale.
- Drag a bar to move it, or drag its ends to change its dates.
- Items without dates wait in the Scheduling inbox beside the timeline. Drag one onto the timeline, or select several and choose Schedule selected.
- Link activities adds a dependency between two items, such as “B starts after A finishes”, with an optional lag in days.
- Scheduling chooses whether dates move only when you move them (Manual) or whether later items follow when an item moves later (Auto-forward). See Scheduling mode.
- Group by, Fit plan and Critical path help you read a large plan. Weekends and team members’ days off are shaded.
Track progress in Kanban and Calendar
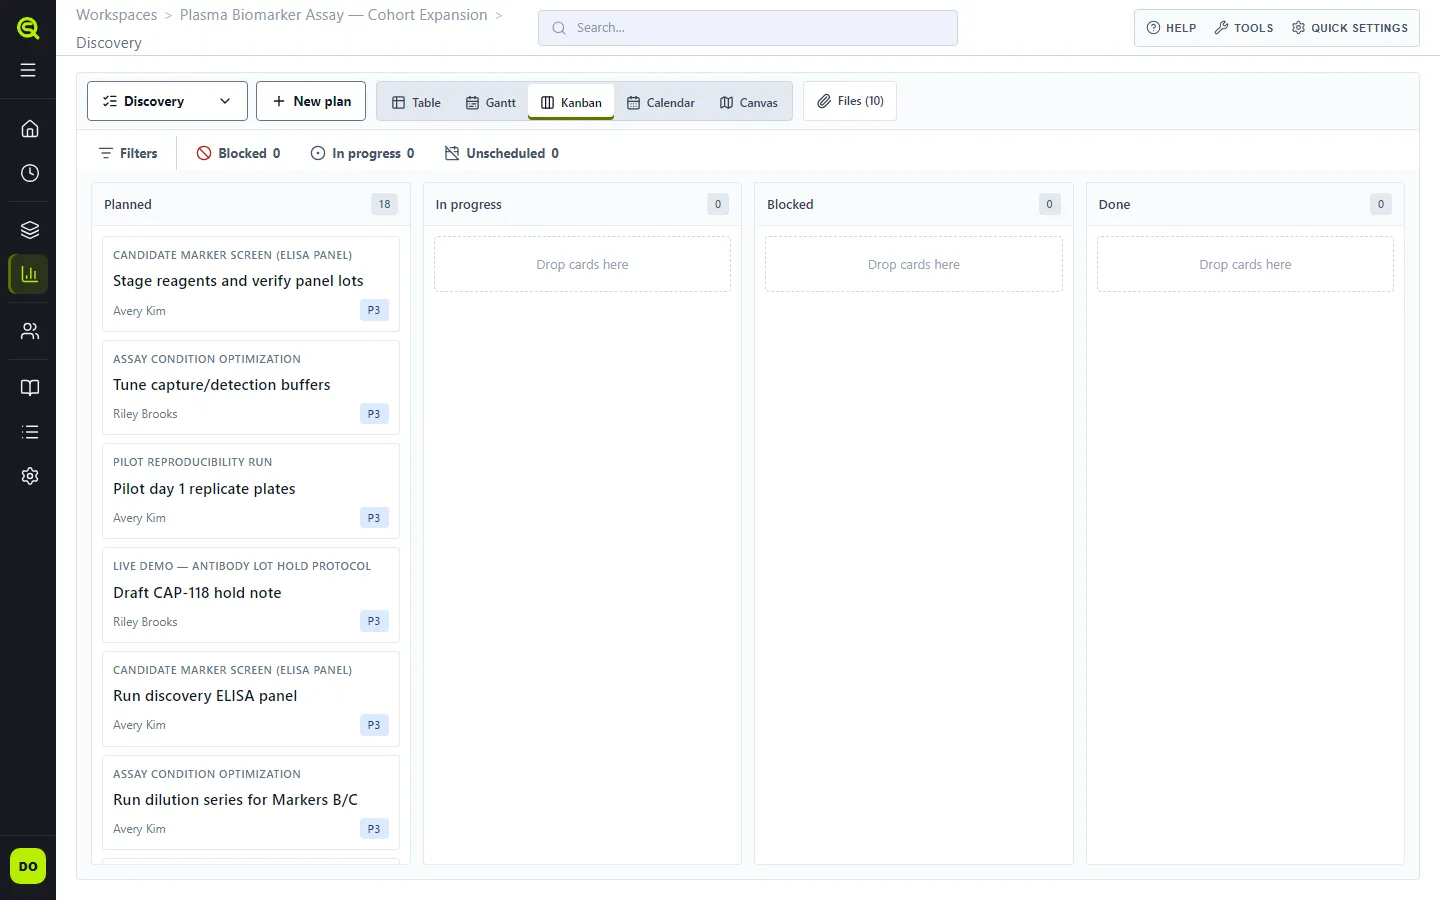
Section titled “Track progress in Kanban and Calendar”Kanban shows the items as cards in a column per status. Drag a card to another column to change its status.
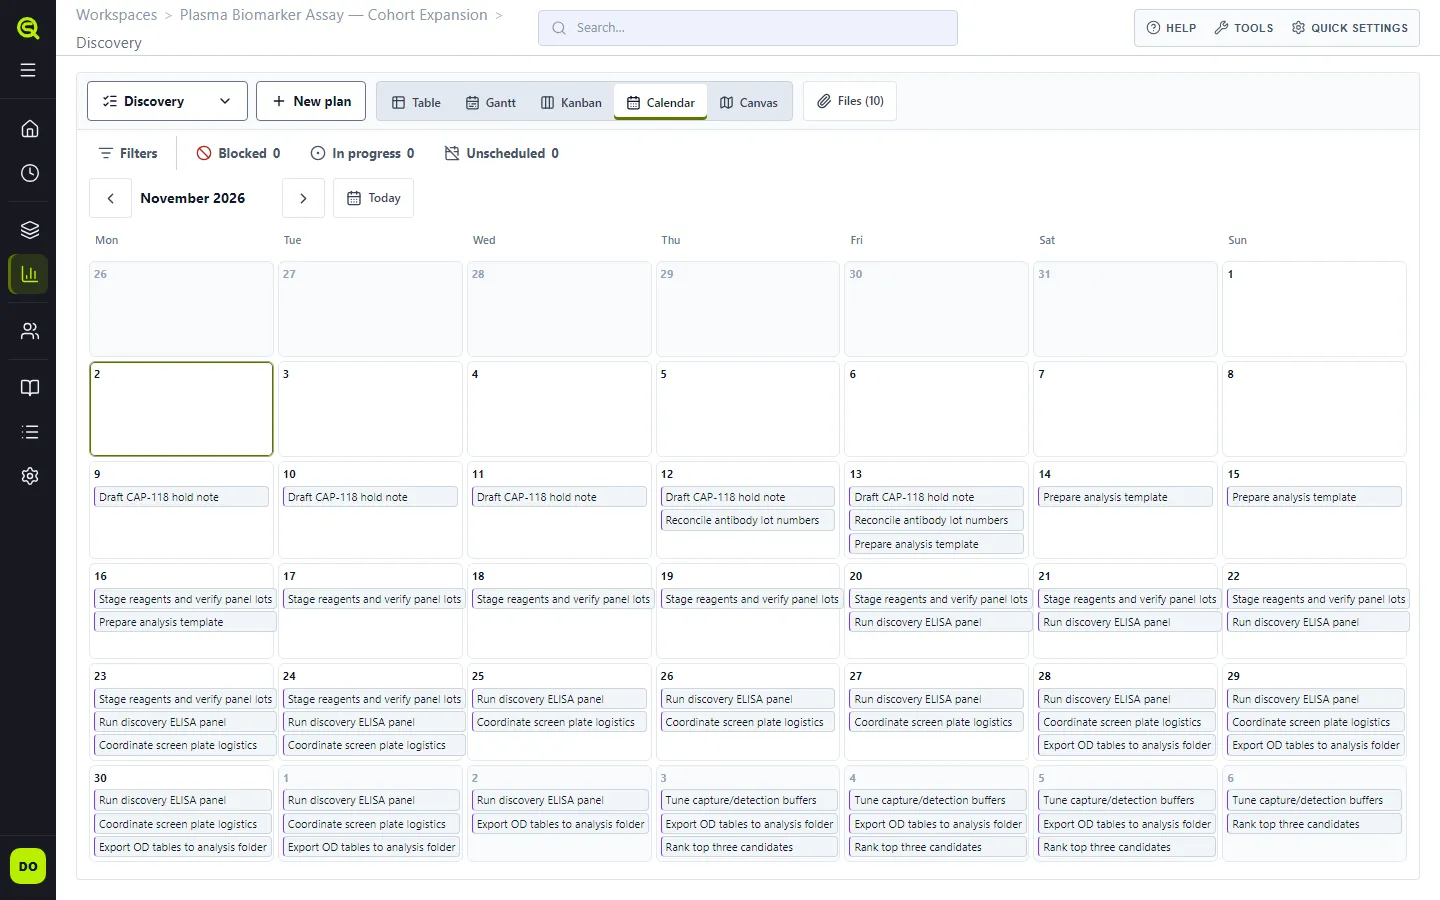
Calendar shows the dated items by month. Both are the same items as the Table and Gantt: a change in one shows in all of them.
Export the plan
Section titled “Export the plan”Anyone who can open the plan can export it.
- Open the plan’s Table tab.
- Select Export.
- Choose Current view for the rows and columns the Table shows, or All columns, all items for every item that isn’t archived.
Your browser downloads a CSV file named after the plan and today’s date. See Export for what the file contains.
Track more detail
Section titled “Track more detail”A plan has a fixed set of columns.
- To track something that has no column, put it in Labels or the item’s Description.
- To break a piece of work into steps, make it a group and add an item for each step. If one step has to wait for another, add a dependency between them.
Each plan keeps one set of filters, sort and columns.
Start from a spreadsheet
Section titled “Start from a spreadsheet”To turn an existing list into a plan, save it as .xlsx or .csv and import it into a new plan.
The steps are in Import from a spreadsheet.