

Canvases and nodes
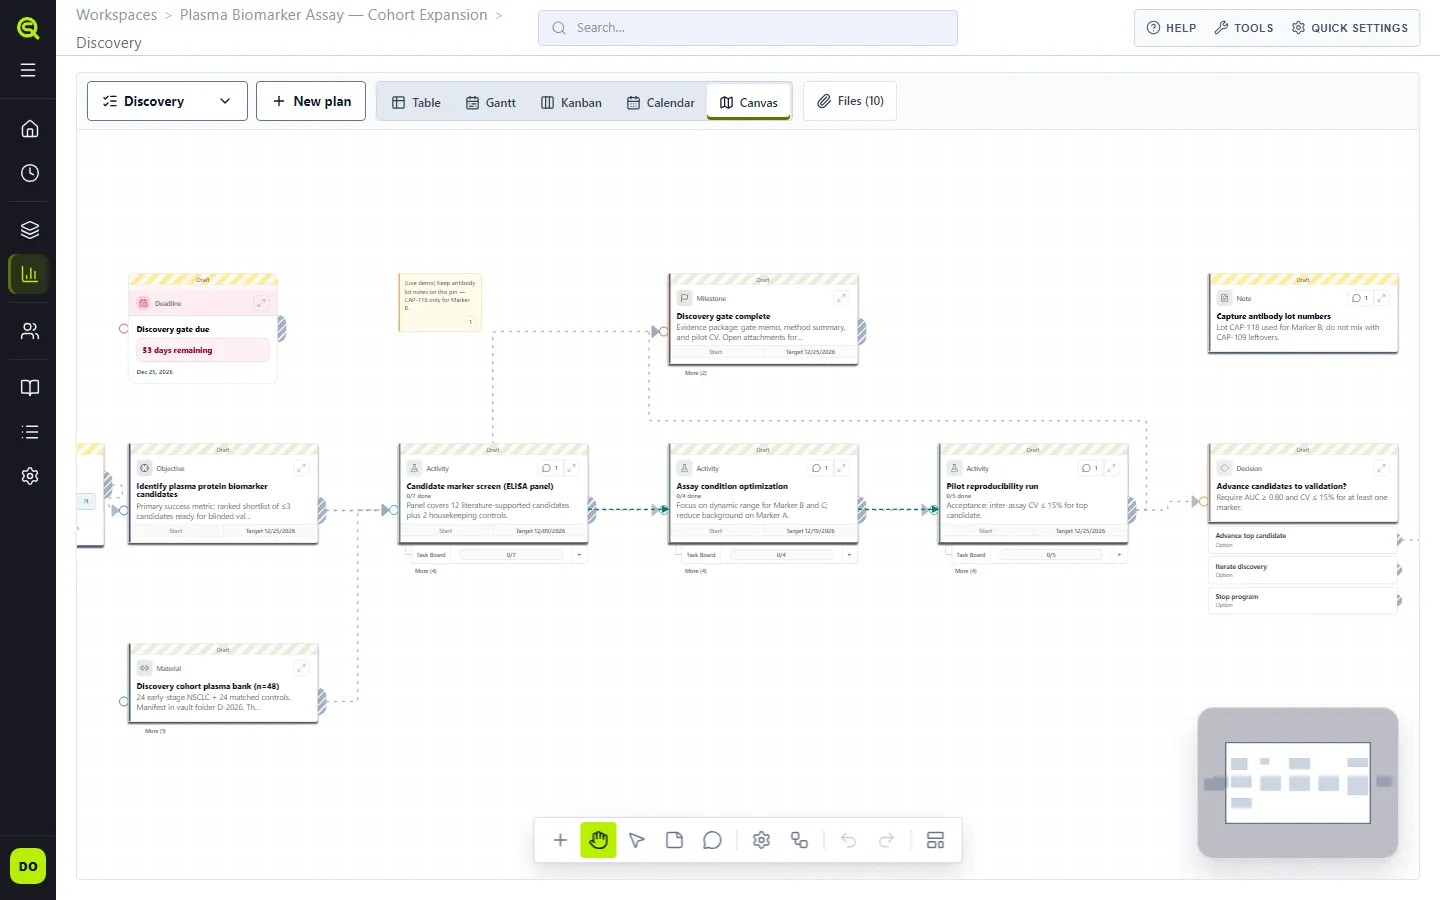
A canvas is a map of an experiment. Each step, material, decision or checkpoint is a node, and links between nodes show the order of the work. You open a canvas from its plan’s Canvas tab.
A canvas always has a plan
Section titled “A canvas always has a plan”Every canvas has exactly one plan behind it. Tasks you add on the canvas show up as items in that plan, and changes to their dates or status in the plan show up on the canvas. You don’t copy work between the two; they’re two views of the same work.
The reverse isn’t true: a plan can exist without a canvas. To give it one, a workspace member opens the plan’s Canvas tab and chooses Create canvas, or Quick build to start from a short form. To add another canvas to a workspace, create a new plan first, then create its canvas.
A node is one element of the experiment. Pick its type when you create it:
| Type | Use it for | Starts with |
|---|---|---|
| Objective | The question or goal the work answers | Text, Dates |
| Activity | Work someone does | Text, Protocol, Task Board, Attachments, Results, Dates, Review |
| Material | Something you use or produce, such as a sample or reagent | Attachments, Text |
| Decision | A point where the flow branches | Options, Text |
| Milestone | A checkpoint | Dates, Review |
| Deadline | A fixed date the work has to meet | — |
| Portal | A jump to another canvas in the same workspace | — |
| Note | Free text on the canvas | Text |
Objective, Activity, Material, Milestone and Note nodes can take any other widget from the picker in their editor. Decision, Portal and Deadline nodes have a fixed shape. Each type and widget is described in Node types.
A Portal opens the canvas you link it to. Choose the destination with Link destination canvas; the list shows the other canvases in the workspace.
Widgets hold the detail
Section titled “Widgets hold the detail”A node’s content is made of widgets. You add, remove and reorder them in the node’s editor.
| Widget | What it holds |
|---|---|
| Text | A description or free notes |
| Dates | Start and end dates |
| Protocol | A link to a personal or shared protocol from Library |
| Task Board | Tasks with an assignee, dates and status; each task is a plan item |
| Attachments | Files from the workspace, managed in Explorer |
| Results | What the work produced |
| Review | A review status for the node |
| Checklist | A list of items to tick off |
| Options | The choices of a Decision node |
Each widget appears at most once per node.
Reading a node card
Section titled “Reading a node card”A node’s card on the canvas leads with how far along it is: under the title, a line such as 1 in progress · 2/4 done counts the tasks in its Task Board. Task Board and Checklist stay on the card; Protocol, Attachments, Results and Review are folded under More, which you open per card. More closes again when you reload the canvas.
A node with status Planned and no task in progress or done is shown in muted colour. It shows full colour while you hover over it or select it, and for good once work on it starts.
A link runs from one node to the next and shows the order of the work. Links connect nodes on the same canvas only; to point at work on another canvas, use a Portal. Notes can’t be linked.
Canvas links show the flow of the experiment. Scheduling dependencies, which move dates, are set separately in the plan’s Gantt.
Arranging nodes
Section titled “Arranging nodes”Arrange nodes in the toolbar lays the whole canvas out left to right along its links, with no node overlapping another. Each node sits one column to the right of the nodes that link to it; a link that loops back to an earlier node doesn’t change the order. Groups of linked nodes stack from top to bottom, and nodes with no links line up in rows below them. The layout starts where the top-left node already is.
The new positions are saved for everyone at once. Undo puts every node back where it was. Undo history belongs to the current canvas and clears when you switch to another canvas. Arranging needs edit access to the workspace and at least two nodes on the canvas.
Editing and saving
Section titled “Editing and saving”Moving a node saves its position at once, for everyone in the workspace. Content is different: changes in a node’s editor are saved only when you select Save. Reset discards them. To open the editor, right-click a node and choose Edit node.
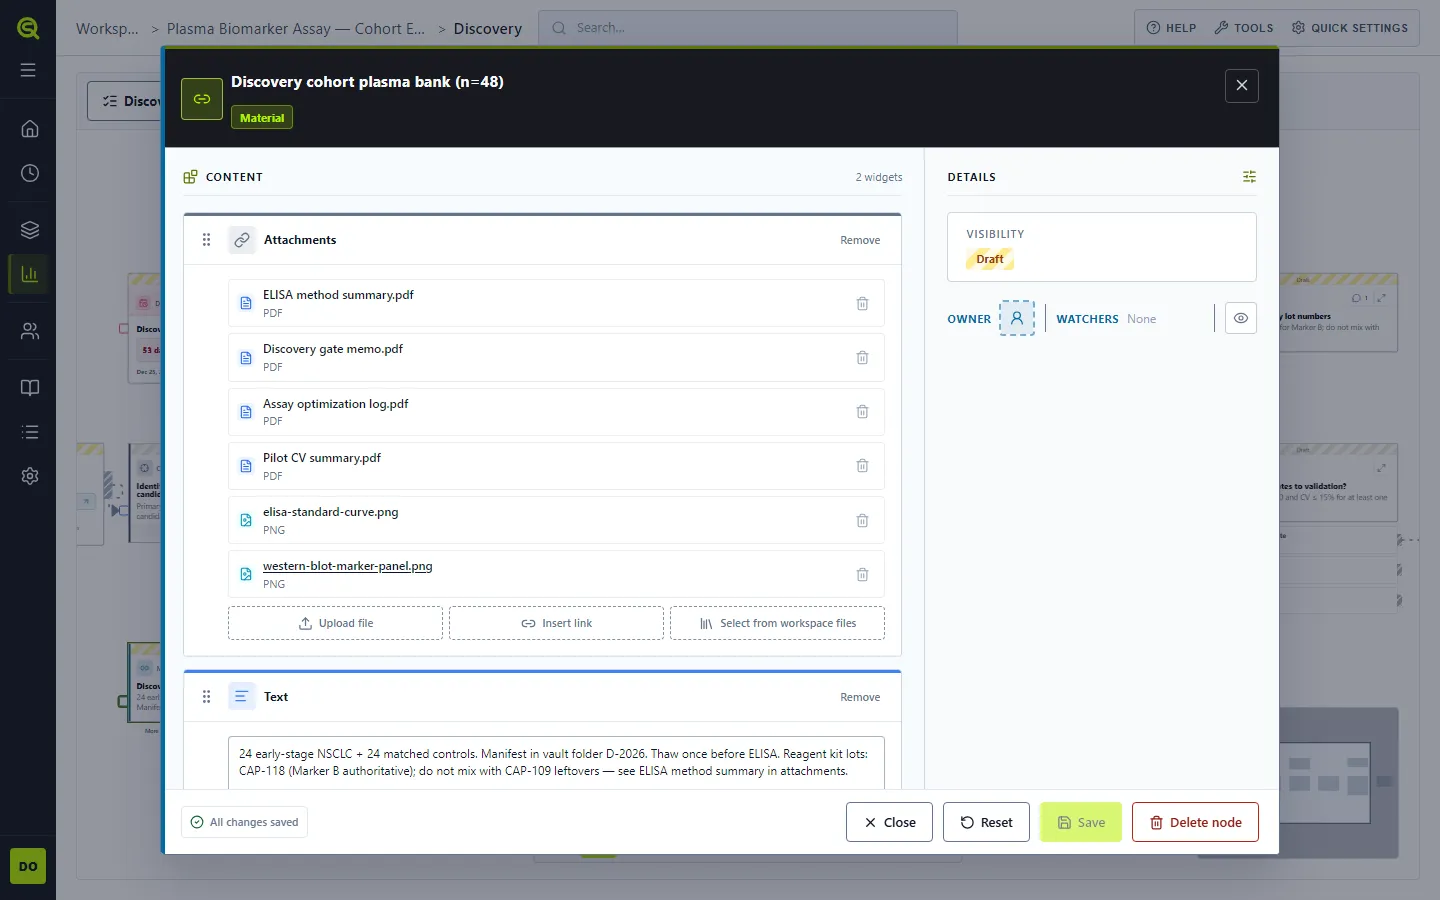
Sauriq never silently overwrites a colleague’s change. If someone saved the same node while you had its editor open, your Save shows an error instead and your edits stay in the editor. If someone changed a link you were editing, the canvas refreshes so you can retry on the latest version.
When machine scheduling is available, changes to a task’s booking also count as changes to its node. Saving or removing a booking from an older node editor can show a conflict; your unsaved edits stay in the editor.
Other ways to fill a canvas
Section titled “Other ways to fill a canvas”- Quick build sets up a starter canvas and its plan from a short form. It’s offered on empty canvases only.
- Insert blueprint stamps a finalized protocol blueprint, a reusable set of nodes built in Library, onto the canvas. See Node blueprints.
- Sticky note and Comment in the toolbar let you leave notes and comment threads on the canvas or on a node without changing the experiment itself.